TOP > Products(Overview and Products Categories) > 3D Vision > FV-SurfaceFinder

FV-SurfaceFinder
3D Measurement/Inspection System with Light-Section Method
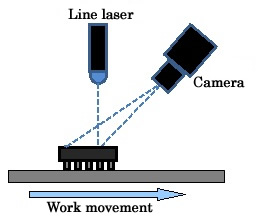
FV-SurfaceFinder (abbr. FV-Surfing) is the system to measure and inspect the object’s dimension and width by using 2D/3D coordinate information with the laser system and the dedicated camera for the Light-Section Method. The FV-Surfing enables the measurement and inspection even though it is difficult to measure uneven surface figures due to the same color, by scanning with the laser to make a clear vision with 2D/3D image.
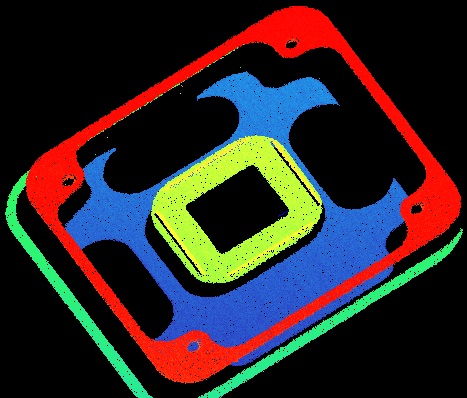
Detectable Defects Which Cannot be Detected by 2D Method
By the light section method with the dedicated laser 3D camera, the FV-Surfing can detect defects which cannot be detected by the 2D method, with using height information. It enables the high-speed processing with the dedicated camera.
Integrated System
We provide the integrated system including a camera, a lens, a line laser, LED lighting, cables, an image processing system and software.
Selectable Camera I/F from 2 Types
You can select the camera from 2 types: GigE Vision or CameraLink
Arbitrarily Setting for Inspection Area
Arbitrarily setting for size and position of the inspection area is available.
Acceptance threshold value can be set per area as well.
Detection of Work’s PositionDetection of Work’s Position
The FV-Surfing detects a position of the target object with the pattern matching to follow the inspection area.
Selectable Acceptance Method
The OK/NG judgment can be selected from the following methods.
・Judgment by Feature Amount of Binary Blob (Dimension / Horizontal&Vertical Size)
・Judgment by Amount of Density Statistics (Maximum, Minimum and Average Value of Gray Image)
・Judgment by Score of Pattern Patching
Preprocessing Filters
The spatial filter processing and image binarization are available before the judgment.
・Smoothing Filter (M×N)
・Median Filter (M×N)
・Gaussian Filter (M×N)
・Binarization (Fixed threshold value)
・Special Filter (Optional function on FAST’s image processing system FV-pixellence)
Shading Correction
If the laser system or the workpiece is inclined, an image which has shading would be created. To prevent this, the FV-Surfing has the function of the shading correction.
Output Information
(1)Processing Information and Result Display Functions
・OK/NG Judgment Result
・Inspection Result
(2)File Management
・Result data can be saved to a file in the CSV format (ON/OFF)
・Processing image can be saved to a file in various formats (ON/OFF)
・Log data can be saved to a file.
Communication I/F
-Photocoupler-insulated DI/DO communication is available for controlling and outputting the judgment result.
・Input Signal: Start/Stop Inspection, Switch Product Type, Error
・Output Signal: OK, NG, Ready, Error
Others
・Parameter Saving
・Password Management
・Trial Mode during Offline Operation
・Touch Screen
・Output Function of Height Actual Size (Conversion value is required to input manually)
Application
※Note that photos posted on this website are not relevant to the systems actually used in the customer’s site.
(1)Recognition of Raised Letters
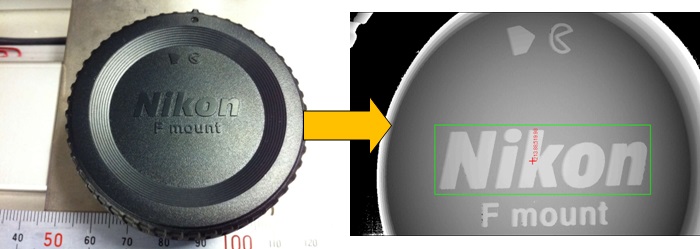
The 2D image is created from the height information of 3D data to search a similar form with various pattern matching algorisms. If the background and the extracted object are the similar color, the recognition with using the 2D camera should be difficult even for monochrome or color image; however, using 3D data makes letters visible.
(2)Food Defect Inspection: Surface Level of Chocolate
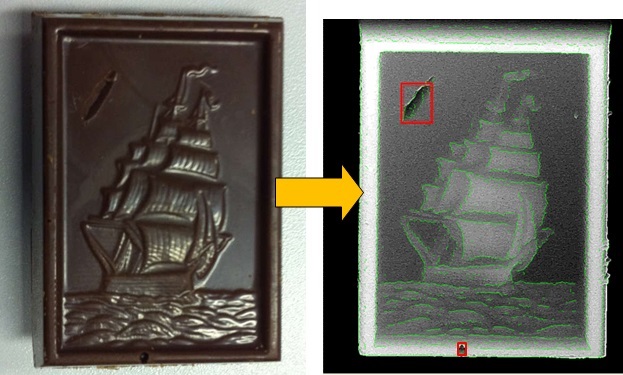
By making 2D image from acquired 3D data, it detects defects on the surface of the chocolate by contrast differences and dimension.
※Note that the mark on the above picture was intentionally scratched by FAST Corporation.
(3)Food Defect Inspection: Volume Inspection of Dumpling
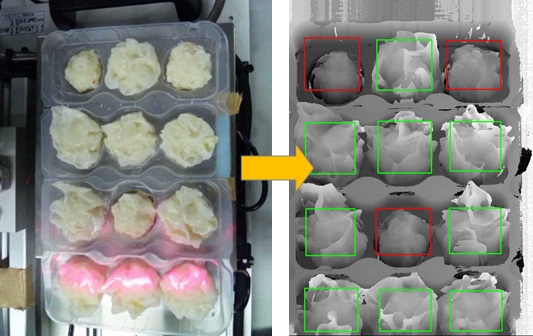
By making 2D image from 3D data, it calculates volume information of 3D space using the density statistics in the selected area.
※Note that the sizes of test objects were intentionally changed by FAST Corporation.
(4)Aluminum Fragment Inspection (Falling Object)
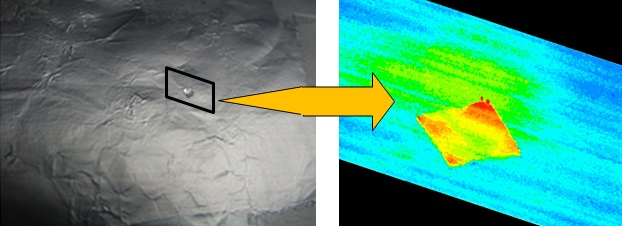
The FV-Surfing detects falling objects (aluminum piece) on the aluminum foil. With using 2D camera, it is difficult to recognize the image due to the same color of the object and the background and the high-reflectivity; however, it enables you to detect the object with using 3D data measured by laser wavelength.
(5)Dispensing Inspection
Motion video (YouTube) for 3D Inspection System of Dispenser. → YouTube
Specification and Performance
Since inspection objects or parts and the equipment configurations including image processing system, camera, lens and lighting are different depending on the customer, so we can provide a system upon request. Please contact our sales for details.


